


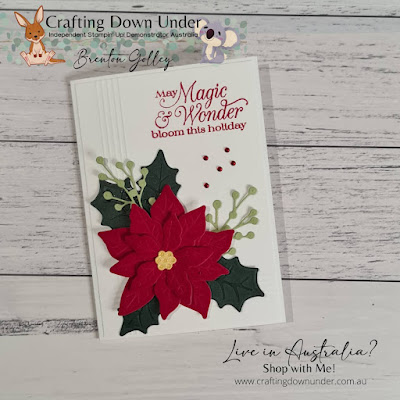
Poinsettia Petals Christmas Cards
Inspired by the many creations using this stunning stamp set and dies. I decided to create my own, I wanted to keep it relatively simple and predominantly let the die cuts and simple stamping speak for themselves. I can say that I totally love how the cards turned out and definitely making some more to send to family and friends this Christmas.
This style of card is for the more avid crafter. But feel free to expand your skills.
Lets Create this Stunning Festive Season Card.
Grab a Card Base in Basic White Thick Cardstock

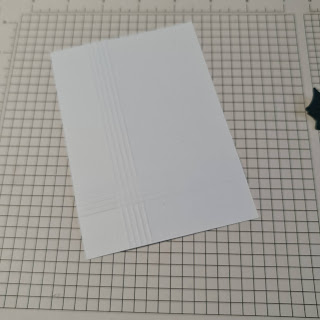
Then take a Basic White Card layer to layer on top of the card base. Grab your Simply Scored Scoring Tool and want you to on the short side, score down the left hand side @ 1/2 inch, then score 4 more times @ 1/8 inch interval from the previous score. Then rotate to the long side and repeat so you have 5 score lines.
Then Die Cut in White and/or Red Velvet specialty cardstock, the 3 sizes of poinsettia petals, run through your Stampin' Cut and Emboss Machine.
(If you do not have the velvet speciality cardstock, please use basic white, real red cardstock but dampen it with water, using your Stampin' spritzers, not to much, just a light spray, let it dampen, then place your dies and run through the cut and emboss machine. You'll be amazed at the detail. Let them dry out a bit.).
Then Die Cut the to leave sizes in Evening Evergreen Cardstock,
Use the above technique and dampen the cardstock before die cutting the leaves.
Then die cut the sprigs in pear pizazz.
(discovered that the sprogs in evening evergreen got lost when layering out the placement).
Cut the Flower centers in so saffron for the red poinsettia and pear pizazz for the white poinsettia.
(did a little google researching for both coloured poinsettia's and discovered their centres were similar to the colours chosen).


Assemble your poinsettias beginning with the largest, then then medium petal, stick a glue dot in the centre on the back and adhere it to the large petal, and do the same for the small petal, and then adhere the flower center with a multi-purpose glue also.
Curl the petals using your bone folder for a bit of dimension and realisation to the flower.


Place wherever you wish to on the card layer, but I placed as close to the bottom right hand corner as I could without the petals protruding to much past the card layer.

Then with your Multi-Purpose liquid Glue (Tombow) on the bottom portion of the leaves, arrange and place them under the poinsettia flower however you wish.
Then strategically place small bods of multi-purpose glue to the Sprigs, and slide them under the poinsettia flowers to glue down. You can arrange them however you wish.
(REMEMBER to not let them protrude to far over the edge of the cardstock)

Then its time to stamp your sentiment. I used evening Evergreen on the White Poinsettia and Real Red for the sentiment on the Red Poinsettia.
Just stamped it in the top left hand corner centred between the edge of the card layer and where the last score line is.
Just stamped it in the top left hand corner centred between the edge of the card layer and where the last score line is.
Then using your Multi-purpose Glue adhere the card layer to the card base.
Make sure you layer it equally around all four sides,
Centred on the card base.
Wick of Stella the flower centers
DON'T forget to BLING your Cards with Rhinestones, Pearls or Sequins.


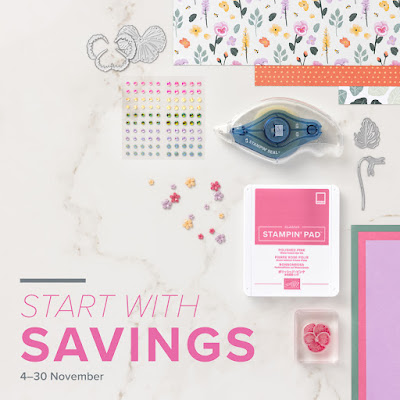
If You would like to Purchase the Products to make these Beautiful Cards.
Please Click on the Add all to Cart.
I will send you via email the PDF Tutorial with all the Measurements.
(DONT FORGET, if your NEW Customer, to create your account so I can sent you your free gift, otherwise you'll miss out. ALSO don't forget to add the Host Code to receive a free gift from me to you.
If your order is Over $250, forget the Host Code. You will receive your own Stampin Rewards in free product.)
 |  |  |  | |
| |  |  |  |  |
 |  |  |  | |
 |  |  |  |  |
 |  |  |  |
")

Come JOIN the Fun!
Great Offer on becoming a Demonstrator.
you can just join as a hobby demonstrator too. No Pressures to do classes or YouTube.
JOIN for $130 AUD, You will receive a KIT to the Value of $235.
AND You pick what you want to be in your Kit.
Receive 20% OFF all your own personal purchases as a Demonstrator.PLUS Early access to NEW Products before each NEW Catalogue.
PLUS You are able to attend Stampin' Up Events., like On Tour! and On Stage!
AND you are apart of the BEST Supportive & Helpful Crafting Community!
FAQ'sAre there quarterly minimums to remain a demonstrator? - YES there is! Do you have to meet them? - NO you don't!
What Happens if I don't! - You simply go back to being a Customer, with no pressure what so ever from Stampin' Up or Myself.Can I Re-Sign again even if I was a Demonstrator before! Absolutely you can Re-Sign up!
What are you waiting For? An Invitation? OK!
Your Invited! YAY! Simply Click on the JOIN MY TEAM TAB on the main page OR the JOIN My Team link below!
It will be an Absolute Pleasure to have you on my team!
AND You pick what you want to be in your Kit.
Receive 20% OFF all your own personal purchases as a Demonstrator.
PLUS You are able to attend Stampin' Up Events., like On Tour! and On Stage!
AND you are apart of the BEST Supportive & Helpful Crafting Community!
What Happens if I don't! - You simply go back to being a Customer, with no pressure what so ever from Stampin' Up or Myself.
Your Invited! YAY!
It will be an Absolute Pleasure to have you on my team!
Comments
Post a Comment